> ## Documentation Index
> Fetch the complete documentation index at: https://docs.usefusion.ai/llms.txt
> Use this file to discover all available pages before exploring further.
# Creating a Quest
> Step-by-step guide to building and configuring a quest.
This guide walks you through creating a quest from scratch — selecting an organization, optionally adding prompts and experiments, configuring onboarding, and publishing.
## Step 1: Choose an Organization
When you click **Create Quest**, you'll see an **org selector dropdown**. Choose which organization the quest belongs to — this determines who can manage the quest and where billing is charged.
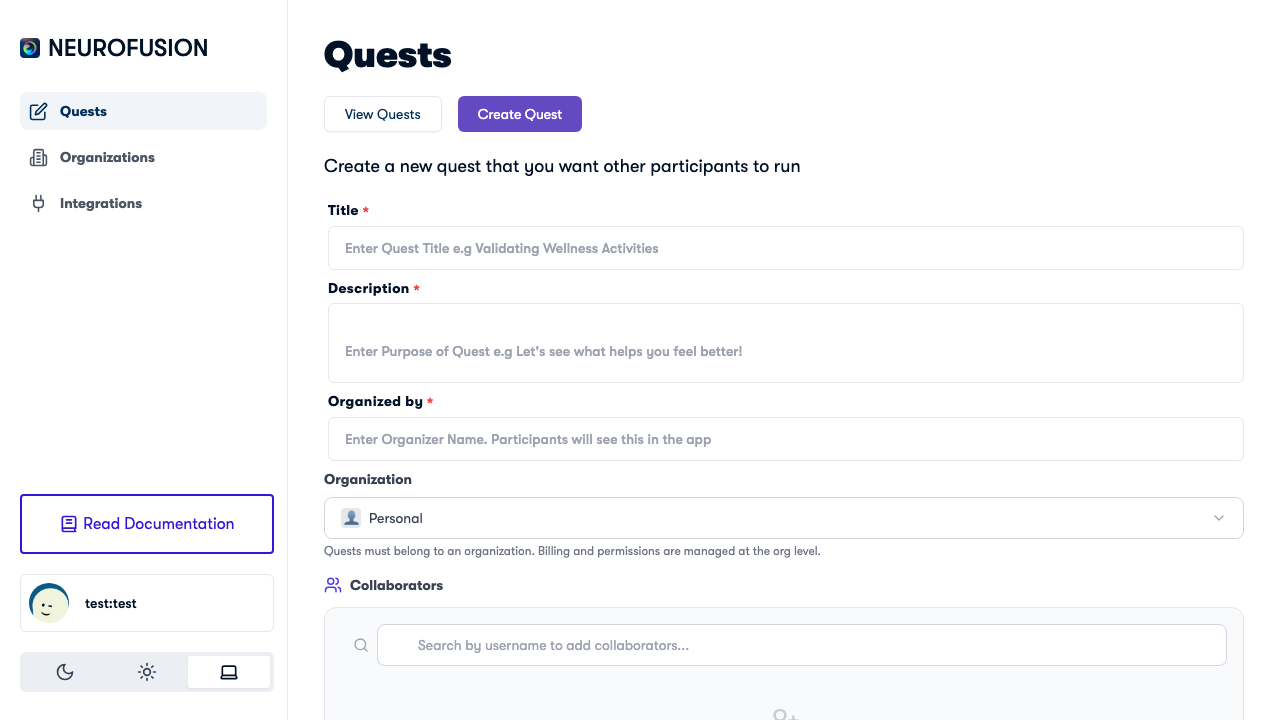 * Select an existing organization from the dropdown
You must create an organization before creating a quest. See [Creating an Organization](/organizations/creating-an-org) to get started.
## Step 2: Fill in Quest Metadata
* **Title** — a clear name for your study (e.g., *"Daily Mood & Sleep Tracking"*)
* **Description** — what the quest is about (shown to participants)
* **Category** — helps organize and discover quests
## Step 3: Add Prompts (Optional)
Prompts are **optional**. Add them when your study needs recurring questions on a schedule, and skip them when your quest is experiment-only, onboarding-only, recording-focused, or otherwise does not need scheduled surveys.
1. Click **Add Prompt**
2. Enter the prompt text
3. Select a response type (Yes/No, Text, Number, Number Range, or Custom Options)
4. Pick a category (Mental Health, Productivity, Health and Fitness, etc.)
5. Configure the schedule: active days, time window, and frequency
If you skip prompts, your quest can still be saved and published — participants just won't receive scheduled survey-style questions.
* Select an existing organization from the dropdown
You must create an organization before creating a quest. See [Creating an Organization](/organizations/creating-an-org) to get started.
## Step 2: Fill in Quest Metadata
* **Title** — a clear name for your study (e.g., *"Daily Mood & Sleep Tracking"*)
* **Description** — what the quest is about (shown to participants)
* **Category** — helps organize and discover quests
## Step 3: Add Prompts (Optional)
Prompts are **optional**. Add them when your study needs recurring questions on a schedule, and skip them when your quest is experiment-only, onboarding-only, recording-focused, or otherwise does not need scheduled surveys.
1. Click **Add Prompt**
2. Enter the prompt text
3. Select a response type (Yes/No, Text, Number, Number Range, or Custom Options)
4. Pick a category (Mental Health, Productivity, Health and Fitness, etc.)
5. Configure the schedule: active days, time window, and frequency
If you skip prompts, your quest can still be saved and published — participants just won't receive scheduled survey-style questions.
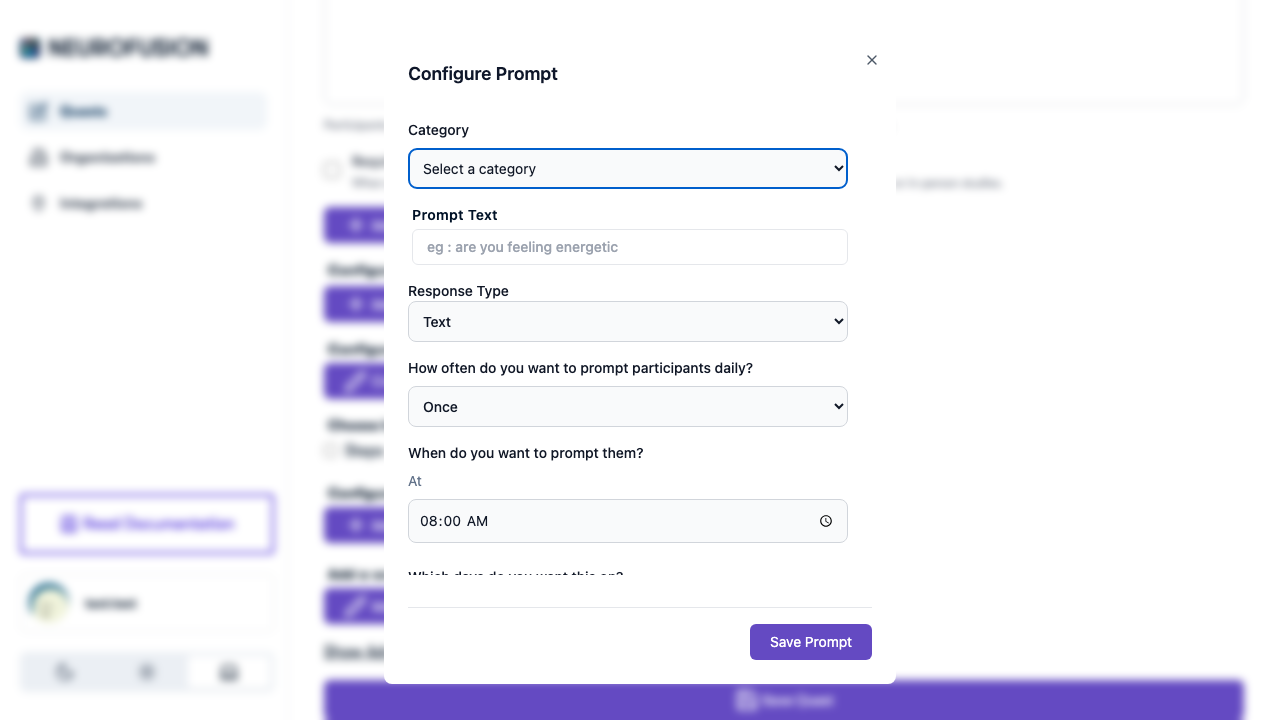 See [Prompts](/prompts/overview) for full details on response types, categories, scheduling, and conditional notifications.
## Step 4: Add Experiments (Optional)
Add interactive jsPsych experiments for participants to complete.
1. Click **Add Experiment**
2. Enter a name and optional description
3. Write or paste experiment code in the Monaco editor (starts with a default jsPsych 8.0.3 template)
4. Upload media (images, audio, video) using the media uploader
5. Use the live preview to test your experiment
You can add **multiple experiments** — they'll be displayed as a horizontal list of cards that participants navigate through.
See [Experiments](/experiments/overview) for full details on the editor, media uploads, and ordering.
## Step 5: Configure Onboarding (Optional)
Set up what participants see before they join the quest:
1. **Full-text overview** — rich HTML content for informed consent, study purpose, and data usage. Participants must check an acknowledgment box before continuing.
2. **Onboarding questions** — screening questions with optional question guards to block ineligible participants.
See [Prompts](/prompts/overview) for full details on response types, categories, scheduling, and conditional notifications.
## Step 4: Add Experiments (Optional)
Add interactive jsPsych experiments for participants to complete.
1. Click **Add Experiment**
2. Enter a name and optional description
3. Write or paste experiment code in the Monaco editor (starts with a default jsPsych 8.0.3 template)
4. Upload media (images, audio, video) using the media uploader
5. Use the live preview to test your experiment
You can add **multiple experiments** — they'll be displayed as a horizontal list of cards that participants navigate through.
See [Experiments](/experiments/overview) for full details on the editor, media uploads, and ordering.
## Step 5: Configure Onboarding (Optional)
Set up what participants see before they join the quest:
1. **Full-text overview** — rich HTML content for informed consent, study purpose, and data usage. Participants must check an acknowledgment box before continuing.
2. **Onboarding questions** — screening questions with optional question guards to block ineligible participants.
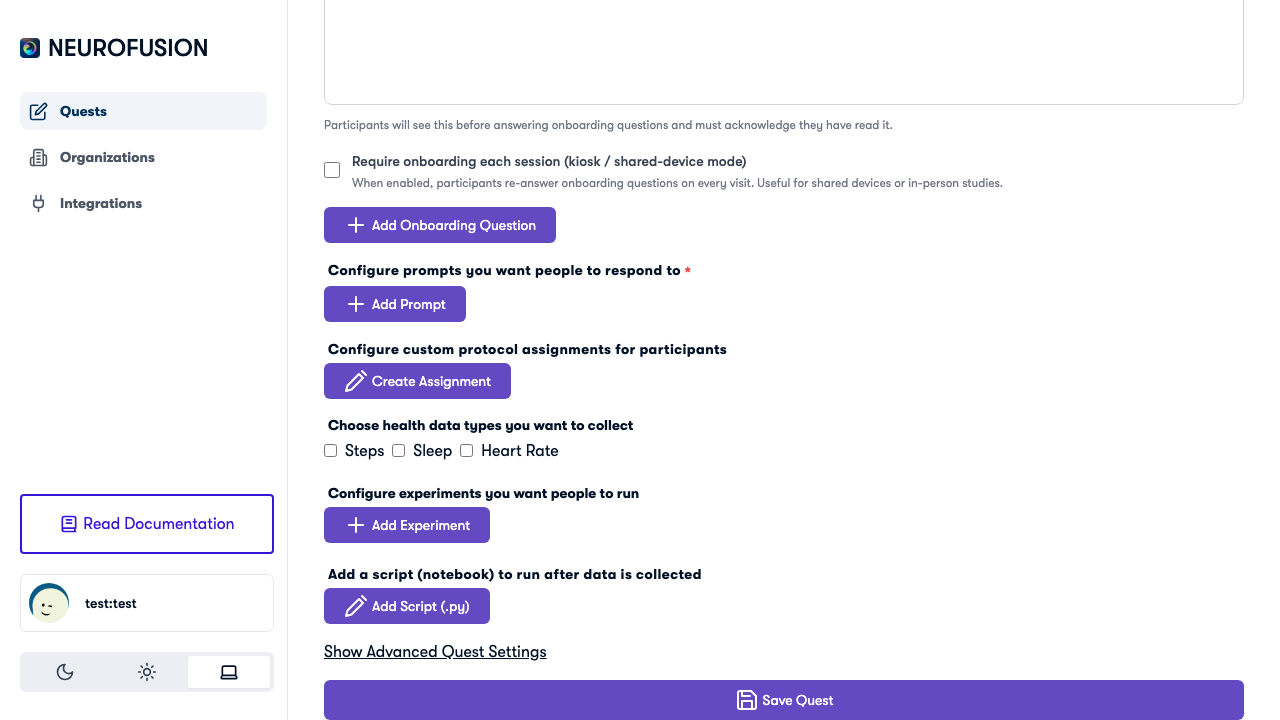 See [Onboarding & Consent](/onboarding/overview) for full details on the overview, questions, guards, and kiosk mode.
## Step 6: Configure Health Data (Optional)
Toggle which health metrics to collect from participants with wearables:
* **Steps** — daily step count
* **Sleep** — sleep duration and quality
* **Heart Rate** — heart rate measurements
## Step 7: Save
Click **Save** to store your quest. This:
* Generates a unique **quest GUID** and URL
* Enables **media uploads** for experiments (you can't upload media until the quest is saved)
* Keeps the quest in **draft** status — it's not visible to participants yet
## Step 8: Publish
Click **Publish** to make the quest live and accessible via its URL.
Publishing consumes credits from the quest's organization. Make sure the org has sufficient credits. See [Pricing](https://usefusion.ai/pricing) for current costs.
Once published, you can share the quest link:
* **Direct link** — copy the URL and send it to participants
* **QR code** — generate a QR code for in-person recruitment
* **Prolific** — paste the URL as your Prolific study URL (see [Prolific Integration](/integrations/prolific))
## Next Steps
End-to-end guide for conducting research.
Share your quest and manage collaborators.
See [Onboarding & Consent](/onboarding/overview) for full details on the overview, questions, guards, and kiosk mode.
## Step 6: Configure Health Data (Optional)
Toggle which health metrics to collect from participants with wearables:
* **Steps** — daily step count
* **Sleep** — sleep duration and quality
* **Heart Rate** — heart rate measurements
## Step 7: Save
Click **Save** to store your quest. This:
* Generates a unique **quest GUID** and URL
* Enables **media uploads** for experiments (you can't upload media until the quest is saved)
* Keeps the quest in **draft** status — it's not visible to participants yet
## Step 8: Publish
Click **Publish** to make the quest live and accessible via its URL.
Publishing consumes credits from the quest's organization. Make sure the org has sufficient credits. See [Pricing](https://usefusion.ai/pricing) for current costs.
Once published, you can share the quest link:
* **Direct link** — copy the URL and send it to participants
* **QR code** — generate a QR code for in-person recruitment
* **Prolific** — paste the URL as your Prolific study URL (see [Prolific Integration](/integrations/prolific))
## Next Steps
End-to-end guide for conducting research.
Share your quest and manage collaborators.